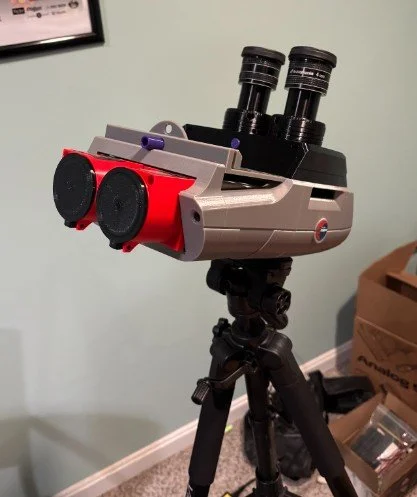
Beyond the Blueprint: Creating a Galaxy - Post 13-Building a 3D printed Telescope “Ember”
So…I sold the 8 inch newtonian. It still is and was a great telescope. The only aspect is that as I get older it gets harder to carry it up and down steps and into the back of a car for transporting. I bit the bullet and decided to build my first 3-D printed telescope from Analog Sky.
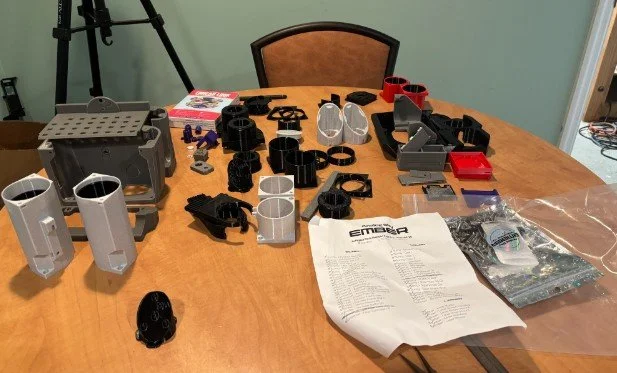
Here is a brief synopsis of the journey and what to expect should you attempt this. Step one is to buy the “course” which is all of the instructions, videos and links to help you build your scope. It is a one time life long payment which is very reasonable. No subscription (thank you analog sky). Now it is decision time. I could buy the telescope outright. I could get the pieces from Analog Sky and build it. I could acquire all of the pieces from other sources. I could 3-D print the pieces myself. I decided to use grant money to get a 3D printer through my school that I could use with students. The learning curve for me provided to be a bit much. I did learn how to use the printer. I did not feel confident enough that I could print 70 plus pieces in PETG. Given more time…maybe.
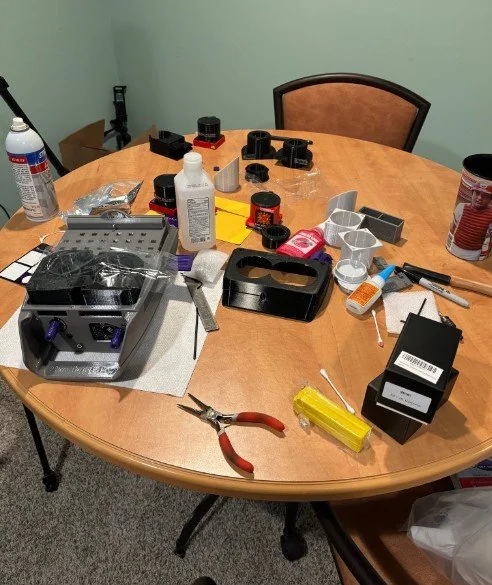
Over time I acquired the 3D printed parts, the hardware, some budget eyepieces and a few necessary tools. Next, I decided to trust the process. Analog Sky has multiple three to fifteen minute videos for every single step of the process. The videos are excellent. Members have the option on the same page of the video to provide comments or ask questions with each step. Again, I found this to be extremely helpful and transparent. Something few companies EVER do.
I learned quickly to take my time, organize my workspace, follow the instructions and to only do one to three videos a day. Patience, for me, was the key. Yes…I did make some mistakes. I was able to fix them with confidence because I had built the entire scope from scratch. I also have a much better understanding of how all the parts work together. I am not afraid to customize it. I can easily use this for solar observing or night observing. I decided to postpone the laser pointer and put on a telrad instead. The telrad is a bit big so I might change to a red dot finder. Again…no fear customization. Any questions or ideas are are supported and encourage on the online forum with the instructions.
I cannot say enough good things about this process and Analog Sky. I have been a science educator for 30 + years and despite my best efforts science education in our country is struggling. Companies like Analog Sky are the answer. They meet you where you are at. You can choose your pathway and get to a great outcome. No materials? No problem…there are multiple options to acquire them. This is totally learning by doing. I do not work for Analog Sky but I wish I did. Thank you Analog Sky. I have a great scientific tool I will be able to use, change and mess with for years to come. Here is the video.